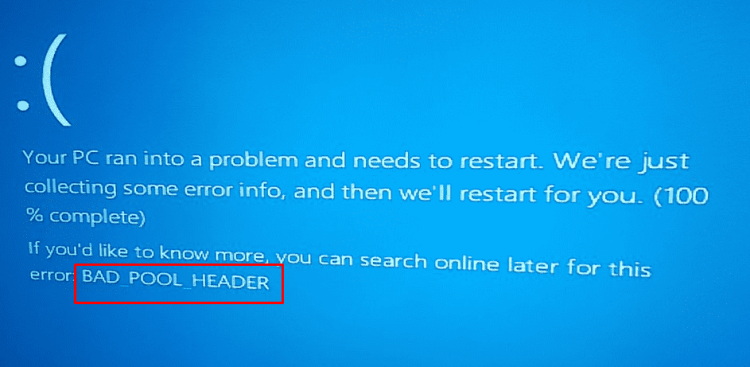
The Bad Pool Header error generally occurs on a Blue Screen of Death (BSOD), when Windows encounters a problem so critical that it becomes near to impossible to fix without having the basic knowledge of what causes this problem and the different ways to solve them properly.
Firstly, the Blue Screen of Death (BSOD) is a clear-cut indication of some fatal error in the system. Sometimes, a simple reboot will fix this BSOD many times. But this specific problem of a Bad Pool Header error should not be ignored because it will cause serious damage to the system later on.
Secondly, there can be several underlying reasons due to which this error occurs. Manually checking each and every possible reason is very much necessary to eliminate risk. Some of the most common reasons are as follows:
- VPN softwares like the Dell Sonic Global VPN might cause this error.
- Damaged or expired hardware components like the RAM or the hard-drive might also be responsible.
- The system’s device drivers might get corrupted and bring up a BSOD and ultimately the Bad Pool Header error.
NOTE: Most of the time the Bad Pool Header will occur on a BSOD which will prevent the user from starting Windows. To continue using Windows, the user is recommended to start Windows in Safe Mode.
Read Also:
Contents
- 0.1 Method #1 UNINSTALL DELL SONIC GLOBAL VPN
- 0.2 Method #2 REMOVE YOUR ANTIVIRUS SOFTWARE
- 0.3 Method #3 REINSTALL YOUR WIRELESS CARD DRIVERS
- 0.4 Method #4 RUN THE BSOD TROUBLESHOOTER
- 0.5 Method #5 RUN THE SFC SCAN
- 0.6 Method #6 RUN DISM
- 0.7 Method #7 DISABLE NVIDIA STREAMER SERVICE
- 0.8 Method #8 REMOVE OVER-CLOCK SETTINGS
- 0.9 Method #9 UNINSTALL YOUR AUDIO DRIVER
- 0.10 Method #10 CHECK YOUR NETWORK ADAPTER DRIVER
- 0.11 Method #11 DISABLE FAST STARTUP
- 0.12 Method #12 CHECK FOR FAULTY HARDWARE
- 1 CONCLUSION
Method #1 UNINSTALL DELL SONIC GLOBAL VPN
The Sonic Global VPN provided by Dell is basically used to create a virtual private network connection between the user’s system and the internet to maintain privacy. Although, this VPN is very secure and encrypted, it sometimes causes connectivity problems for the user.
This VPN service is somewhat not fully compatible with Windows 10. This software might cause Bad Pool Header error to occur by crashing the system and leading it to a BSOD.
To avoid this problem altogether, uninstall this VPN software. Follow these steps to uninstall the Dell Sonic Global VPN software.
- Go to the Start Menu and search for “Add or remove programs” and open it.
- Search the list for the Dell Sonic Global VPN software.
- Single left-click on its icon and choose “Uninstall”.
- Follow the steps in the un-installation wizard to complete the process.
- Restart the system.
Method #2 REMOVE YOUR ANTIVIRUS SOFTWARE
Antivirus software are the stronghold of the system that protects and keeps the computer safe from viruses, malware, etc. Sometimes, antivirus software cannot identify friendly files and software and instead prevents them from running.
This causes incompatibility in the system and hence the BSOD along with Bad Pool Header error occurs. To ensure that this is not a repetitive scene for the system, the user is recommended to remove the present anti-virus software permanently and install a different one.
To do this, follow the steps given below:
- Go to the Start Menu and search for “Add or remove programs” and open it.
- Search the list for the Anti-virus software.
- Single left-click on its icon and choose “Uninstall”.
- Follow the steps in the un-installation wizard to complete the process.
- Restart the system.
This will hopefully fix any problems caused by the anti-virus software.
Method #3 REINSTALL YOUR WIRELESS CARD DRIVERS
Wireless card drivers and network drivers are software that is installed on the system’s hard disk that allows the operating system to connect to a network.
Sometimes, these network drivers might get out-dated or might malfunction which can cause inconsistency in the networking system of the computer. This might lead to application as well as software crashes in the system that’ll most likely lead to the BSOD and cause the Bad Pool Header error.
The best way to fix this problem is to completely re-install these drivers. To do this, follow the steps given below:
- Press the Window Key + X to open the Quick Access Menu. Then, select “Device Manager” and open it.
OR
Go to the Start Menu and search for “Device Manager”.
- Go to the Network Adapter tab and click on the drop-down list to show the available drivers in the system.
- Identify the particular driver that the system uses to connect to networks.
- Right-click on it and select “Uninstall”.
- Again, on the top menu bar click on Action button and then select “Scan for hardware changes”.
- This should automatically trigger the system to re-install the deleted drivers.
- Restart the computer.
This should fix any problems that were being caused by network and wireless card drivers.
Method #4 RUN THE BSOD TROUBLESHOOTER
Troubleshooting is basically the process of searching and finding an error in the system through the process of elimination of possible errors.
This troubleshooting diagnosis is made possible with the Windows 10 in-built Troubleshooter. This particular troubleshooter identifies the problem or error and fixes it automatically without the user having to do a thing.
To troubleshoot this error of BSOD, follow these steps:
- Go to the Start Menu and then, open Settings
- Select the Update & Security
- Click on the “Troubleshoot “option from the panel on the left side of the screen.
- Find the “Blue Screen” option from the Find and fix other problems sub-menu on the right-panel.
- Click on “Run the troubleshooter”.
- Follow the instructions given by the troubleshooter wizard to complete the process and fix this issue.
NOTE: Troubleshooting option is not available for Windows 10 Home version but it can be installed in the Windows 10 Pro version to work.
Method #5 RUN THE SFC SCAN
The SFC scanner is a command prompt console line that is used to scan and check the system’s vital as well as protected files for corruption or malfunction. Upon detection of any corrupted file, the scanner will automatically replace those files with a backed-up copy that is stored as cache in the operating system folder of the PC.
The way to execute this scan method is as follows:
- Go to the Start Menu and search for “cmd”.
- Run it on Administrator mode.
- The Command Prompt console pops-up instantly.
- Type in “sfc/scannow” and press ENTER.
- This will run the SFC scanner automatically now.
After pressing enter, the Scanner starts to run in the system background checking for errors and verifying the system files. The process takes some time to complete and upon completion will fix and repair corrupted files in the system.
Method #6 RUN DISM
The Deployment Image Servicing and Management (DISM.exe) is a command-line that network administrators can use to mount and service a Windows image or the hard disk itself before releasing it to the general users.
This process of running the DISM will clean out all the issues that might potentially cause a BSOD and hence the Bad Pool Header error will be fixed.
To fix the error using this method, follow the steps given below:
ONLINE MODE
- Go to the Start Menu and search for “cmd”.
- Run it as an administrator.
- Enter the following command to execute the DISM.
DISM/Online/Cleanup-Image/RestoreHealth
- Wait for the process to end.
- Restart the system.
OFFLINE MODE
NOTE: The Windows 10 1809 ISO, which is also known as the Windows 10 installation Media, must be re-downloaded from the website mentioned below. This will require active internet connection for the download.
https://www.microsoft.com/en-in/software-download/windows10
- The downloaded file must then be mounted on the computer. This way the system can extract its resources.
- Press the Windows key + X and open “Windows PowerShell (Admin)”.
- Enter the following commands now:
- DISM /Online /Cleanup-Image /StartComponentCleanup
- DISM /Online /Cleanup-Image /AnalyzeComponentStore
- DISM /Online /Cleanup-Image /RestoreHealth /source:F:\Sources\Install.wim:1 /LimitAccess
- The F is to be replaced with the letter of the drive on which the file is mounted upon.
- The system will repair Windows.
- Restart the computer.
Method #7 DISABLE NVIDIA STREAMER SERVICE
The Nvidia Steamer Service is a software component of the Nvidia GeForce Experience by Nvidia. This service is responsible for performance optimization, recording and streaming programs designed specifically for Nvidia drivers. This service sometimes causes unwanted problems with the system and conflicts with the normal functioning of the computer.
To deal with this problem, it is better to disable this service.
- Go to the Start Menu and search for “Services” and open it.
- Navigate to the Nvidia Streamer Service and double click on it.
- Under the General tab, set the Startup Type to “Disabled” and click on the “Stop” button.
- Click on Apply and then OK to save the settings.
- Restart the system.
This will stop the service immediately and prevent automatic optimizations for the system that might have been causing errors.
Method #8 REMOVE OVER-CLOCK SETTINGS
The term ‘Over clocking’ is used when a user increases the clock rate of a system’s CPU to improve overall speed of the system and also its performance. Every PC is loaded with a processor which has chips as its component.
These chips are sped up by over clocking the processor which in turn provides more power to the system. But over-clocking has side effects. Some of these are discussed below:
- Over-clocking reduces the lifespan of the particular component which is being over-clocked.
- Over-clocking heats up the system and this could harm the whole computer. This will cause instability and applications will start to crash upon running.
Ways to revert over-clocking are as follows:
- Go to CMOS or BIOS settings of the system by pressing F2 while rebooting and reverse the voltage of the motherboard back to normal.
- This can also be done by choosing the ‘Restore Fail Safe Defaults’ option.
Systems should not be over-clocked if not needed to be; otherwise serious damage could be caused by the heating of the core processor of the system.
Method #9 UNINSTALL YOUR AUDIO DRIVER
Audio drivers are softwares that an operating system uses as interface applications that allow the system to sync up with audio devices connected. These drivers convert the signals from the system and make it readable on the audio device.
Sometimes, these audio drivers might get corrupted that can create problems for the system such as the BSOD error. To fix this, these drivers should be uninstalled.
- Press the Window Key + X to open the Quick Access Menu. Then, select “Device Manager” and open it.
OR
Go to the Start Menu and search for “Device Manager”.
- Go to the Sound, video and game controllers tab and click on the drop-down list to show the available drivers in the system.
- Identify the particular audio driver that the system uses to connect to audio devices.
- Right-click on it and select “Uninstall”.
- Again, on the top menu bar click on Action button and then select “Scan for hardware changes”.
- Restart the computer.
This should fix any problems that were being caused by these audio drivers.
Method #10 CHECK YOUR NETWORK ADAPTER DRIVER
Network Adapter Drivers are sometimes responsible for the Bad Pool Header error according to many users. To make sure that the network adapter driver is not the root cause of the error, it is recommended to get it checked.
To do this, follow the steps given below,
- Press the Window Key + X to open the Quick Access Menu. Then, select “Device Manager” and open it.
OR
Go to the Start Menu and search for “Device Manager”.
- Go to the Network Adapter tab and click on the drop-down list to show the available drivers in the system.
- Identify the particular driver that the system uses to connect to networks.
- Right-click on it and select “Properties”.
- Click on the Driver tab to view details about the driver version.
- Check online if the driver version is compatible with the system’s software and hardware properties.
- Also be sure to update the driver just in case.
- Restart the computer.
NOTE: Download the Intel System Support Utility application to automatically identify the compatibility of the drivers in the system. The link from where to download is: https://downloadcenter.intel.com/search?keyword=System+Support+Utility
Method #11 DISABLE FAST STARTUP
Fast Boot or Startup is a feature in the Windows 10 OS that drastically reduces the total time for the computer to boot-up after being fully shut-down. Sometimes, this feature causes problems with applications that don’t support sleep mode or hibernation mode. This could be a factor that might be causing BSOD with the Bad Pool Header error.
The best way to deal with this is to disable the fast boot option completely to ensure that the functioning of system is not jeopardized because of it.
USING CMD/POWERSHELL:
- Press the Windows key + R or X to open the cmd console or the Windows PowerShell.
- Run as Admin.
- Copy and paste the following and press enter: exe /hibernate off
USING CONTROL PANEL:
- Go to Start Menu and open Settings.
- Click on the “System” tab.
- Click on the “Power and Sleep” tab from the list on the left.
- Click on Additional power settings under ‘Related settings’.
- Click on “Choose what the power buttons do”.
- Uncheck the box beside Turn on fast startup.
NOTE: If the check boxes are turned grey and unavailable, click on the “Change settings that are currently unavailable”. Restart the computer.
Method #12 CHECK FOR FAULTY HARDWARE
Faulty hardware are basically hardware components or the software drivers of hardware that have been incorrectly installed or uninstalled. They may also be outdated, corrupted, or wrongly configured devices or drivers. Faulty hardware have a very bad impact on the system and should be replaced or installed correctly.
The most common hardware that causes errors is the RAM in the system that might have been corrupted or damaged. The best way is to deal with this problem is to replace it.
Be sure to check each and every component of the system. Many times, faulty software are the main cause of the Bad Pool Header error accompanied by the BSOD. These hardware should be replaced immediately.
Method #13 RESET WINDOWS 10
Resetting the Windows OS is a complete failsafe method to deal with the Bad Pool Header error if all else fails.
Follow these steps to successfully and easily reset your Windows 10.
- Go to the Start Menu and then, open Settings
- Select the Update & Security
- Click on Recovery on the left panel.
- Click on “Get Started” under the Reset this PC
- Click either on “Keep my files” or “Remove everything. All of the system’s settings will be returned to their defaults properties and third party apps will be uninstalled permanently.
NOTE: “Remove everything “will: delete all of the system’s files, photos and installed programs.
- Continue through the process by choosing Next until the Reset option prompts up. There’s no going back from this point. Then click on
Resetting Windows will definitely solve all the issues that might be causing the BSOD error of Bad Pool Header.
Read Also:
- Res://aaResources.dll/104
- Your Windows License Will Expire Soon
- Error Loading Player: No Playable Sources Found
CONCLUSION
The Bad Pool Header error along with the BSOD is very annoying for users and can prove quite difficult to get rid of without the proper technical knowledge. Use the Solutions given in this guide to fix this issue once and for all.