Antimalware Service Executable is a background process of Windows Defender, the in-built anti-malware software of Windows OS. Its executable file is MsMpEng.exe.
The tasks of this process include conducting background system scans, checking files and apps for malware when opened by the user, installing updates, and other things. These functions consume a significant portion of the RAM, disk space, and network bandwidth.
In other words, the antimalware service executable has a high CPU usage, which adversely affects other functions of the computer. The user may thus experience a slowdown. When a system scan is in progress by Windows Defender, such a slowdown is usual. Other tasks are halted for the time being, and one simply has to wait for the scan to be completed.
However, such a full scan must be conducted only periodically, and not on a daily basis. Due to faulty settings, the scan may be scheduled to happen daily, or whenever the computer restarts. It takes the CPU, and leads to lagging, affecting other functions on the device. Thus, we discuss ways to rectify this issue in this article.
Contents
5 Ways to Fix Antimalware Service Executable High CPU Usage
The following are the methods to fix the problem of high CPU usage by Antimalware Service Executable process.
Method #1 Scan For Malware
There is a possibility of the MsMpEng.exe process being affected by malware. Often, malware can assume the names of regular files (including MsMpEng.exe) and exist on your computer. Thus, using a third-party antimalware program downloaded online may help detect any such malware.
Other Errors:
- api-ms-win-crt-runtime-l1-1-0.dll is missing
- A Problem Has Occurred in Bitdefender Threat Scanner
- Windows Update Error Code 0x8024a105
- Delete Google History, Search, and Location Data
Method #2 Reschedule Windows Defender Properly
Rescheduling the Windows Defender scan can rectify the problem of high CPU usage. The following are the steps to reschedule the process.
Step 1: Go to Task Scheduler. This can be done by typing “task scheduler” in the Windows search bar and opening it. Alternatively, type “taskschd.msc” in Run dialogue box (to open it press Windows + R) and press Enter.
Step 2: In the Task Scheduler window’s left panel, double-click the Task Scheduler Library folder to expand it.
Step 3: Under Task Scheduler Library, double-click and expand the Microsoft folder.
Step 4: Under Microsoft, double-click and expand Windows folder.
Step 5: Under Windows, find and open the Windows Defender folder.
Step 6: In it, double-click “Windows Defender Scheduled Scan” option.
Step 7: Select Properties.
Step 8: In Properties window, first uncheck “Run with highest privileges” option in General tab.
Step 9: Then go to the Conditions tab, and uncheck all options to clear scheduled scans. Then click, OK.
Step 10: Now, you must reschedule the scans. Open Properties window again, then go to Triggers tab and schedule new scans at times of your choice. A weekly or monthly scan is ideal.
Step 11: Repeat the entire procedure from steps 7 to 10 in case of the following options:
Windows Defender Cache Maintenance, Windows Defender Cleanup, and Windows Defender Verification.
Also Read:
Method #3 Turn off Windows Defender
This method is recommended only if other ones don’t work out. It is because disabling Windows Defender will render your system vulnerable to malware attacks. You must install another antivirus program before disabling Windows Defender, preferably one which will have lesser CPU usage. There are two ways to disable Windows Defender. Both have been described below.
Use the Local Group Policy Editor
This method is possible is certain advanced versions of Windows. In case your system enables it, try it.
Step 1: Open Run dialogue box (press Windows + R) and type “gpedit.msc“. Then press Enter.
Step 2: The Local Group Policy Editor window will open. In its left panel, select and expand the folder Computer Configuration.
Step 3: Under this folder, select and expand the following folders one after the other – Administrative Templates > Windows Components > Windows Defender.
Step 4: Select Windows Defender. Then locate and double-click the option “Turn off Windows Defender” in the Settings panel.
Step 5: In the window that will open, select the “Enable” option. Then click Apply and OK.
Step 6: Restart the computer and check whether Windows Defender has been successfully turned off.
Use the Registry
In case, the first way is not possible on your computer, try disabling Windows Defender through the Registry. Follow the steps below:
Step 1: Open Run dialogue box, type “regedit” and press Enter.
Step 2: In the Registry Editor window, navigate as follows:
HKEY_LOCAL_MACHINE\SOFTWARE\Policies\Microsoft\Windows Defender.
Step 3: In Windows Defender folder, locate the item DisableAntiSpyware, and double-click it
Step 4: In the window that opens, set the value to 1.
If you don’t find DisableAntiSpyware, right-click on the main Registry Editor pane and select New > DWORD (32 bit) Value. Then name this item “DisableAntiSpyware” and set its value to 1.
Method #4 Add Antimalware Service Executable
The high CPU usage by Windows Defender can be reduced by adding its executable file MsMpEng.exe to the Exclusion List. This will prevent it from scanning itself, hence reducing CPU usage. Following are the steps of this method:
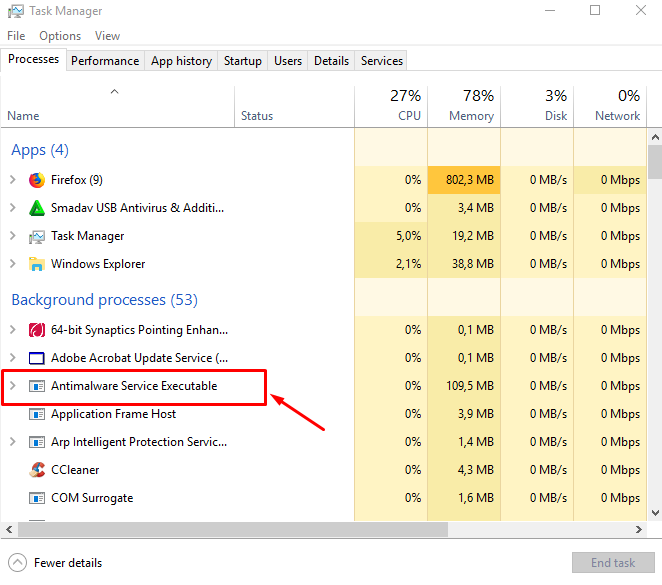
Step 1: Open Windows Task Manager by pressing Ctrl + Shift + Esc.
Step 2: Locate the Antimalware Service Executable process and right-click on it. Then select Open File Location.
Step 3: Note the file MsMpEng.exe highlighted. Copy its address bar. Close the Task Manager.
Step 4: Now open Windows Settings (press Windows + I). In its left pane, select Windows Defender.
Step 5: Select “Add and Exclusion” option, then click on “Exclude a .exe, .com or .scr process”
Step 6: Paste the file path you copied, and click Add.
Method #5 Removing Bad Updates
Often, Windows Defender gets faulty virus definition updates. This leads it to flag even secure files as malware. We can remove such bad updates if they exist. Following are the steps to do so:
Step 1: Open Command Prompt as follows: search “cmd” in the Windows search bar, and select “Run as administrator” option.
Alternatively, type “cmd” in Run (open it by pressing Windows + R) and press Shift + Ctrl + Enter to open Command Prompt as administrator.
Step 2: In Command prompt, first type “Yes” and press Enter.
Step 3: Then, type the following commands and press Enter after each (make sure to include the commas):
"%PROGRAMFILES%\Windows Defender\MPCMDRUN.exe" -RemoveDefinitions -All
"%PROGRAMFILES%\Windows Defender\MPCMDRUN.exe" -SignatureUpdate
The process will take some time. After its completion, check if the issue has been resolved.
Also Read:
Conclusion
Thus, different ways to address the issue of high CPU usage by the Antimalware Service Executable have been discussed. While Windows Defender is crucial to the system’s security, there is no need for its background process to run always. If this issue can be resolved, the overall functioning of the computer shall not be impeded.