Avast is a part of antivirus software in worldwide. In spite of many antivirus software, it also demands-resources. This is because they perform numerous real-time operations such as full virus scan, background scanning, virus removal, and clean up. If your Avast Service is taking High CPU power, you may get irritated.
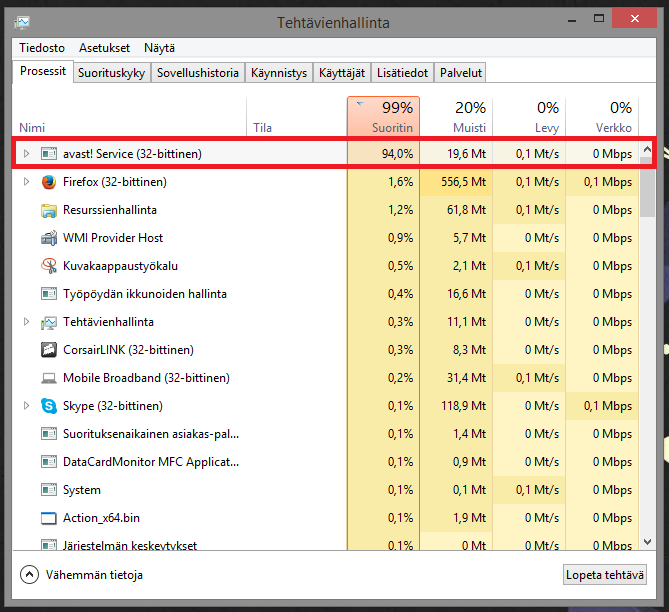
When you check the Task Manager in case of a CPU slowdown, you may note the cause of ntoskrnl.exe upgrading CPU resources or consuming more RAM resources. Moreover, Avast also has this trouble, and its users say if this problem arises frequently, it will reduce the usage of the CPU.
Apart from this, if you do anything on your computer, it will interrupt. There are various ways to rectify this issue. This article will surely tell you how to fix Avast Service High CPU Usage.
Read Also:
Contents
How to Fix Avast Service High CPU Usage in Windows 10
Method #1 Removing Avast Cleanup
The essential element for this issue appears to be the real-time Avast Cleanup. It liberates specific resources assigned by other background applications. Consistently, something that does its job in real-time is heavy on the processor. So, uninstalling these components is sometimes best.
Step 1: First, launch the Avast Antivirus by clicking its icon in your Start Menu entry.
Step 2: Then, navigate to Settings and then click the Components tab that should be the second.
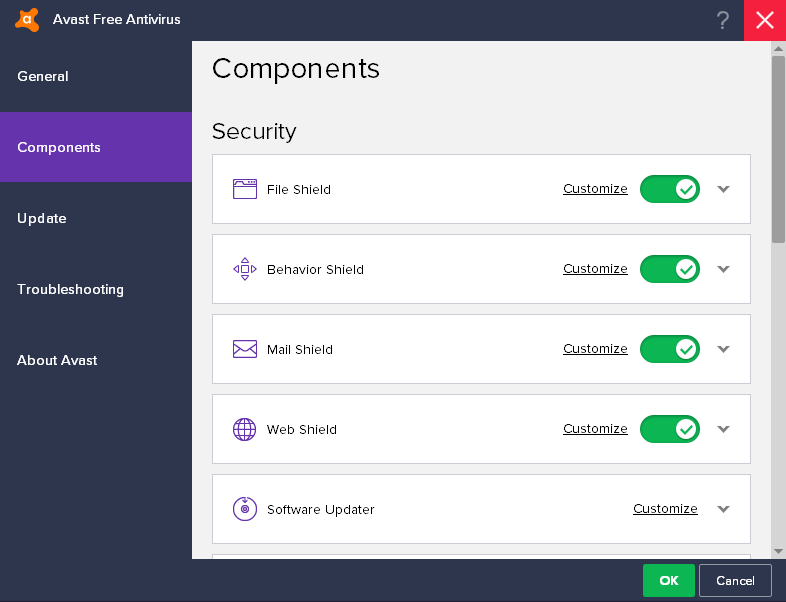
Note: You may not be able to find the Components option in the new or updated Avast application. In this case, you can go to the Troubleshooting Option and then click on the Open Old Setting at the end.
Step 3: After that, click the downward-facing arrow next to the component you want to remove (Avast Cleaner in this particular example). Click Uninstall components, and then click OK to confirm the uninstall of the component.
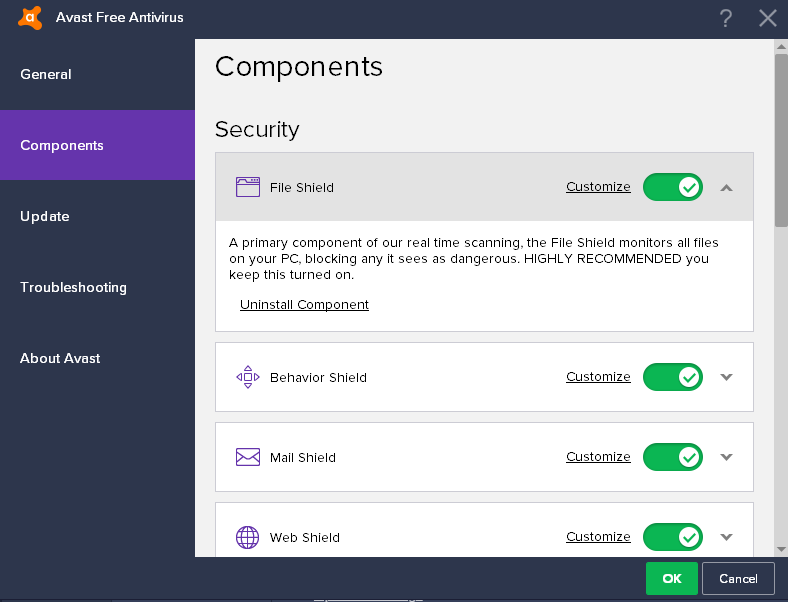
Step 4: Finally, restart your computer if Avast asks you to confirm the changes. Check to see if the CPU usage is back to normal.
Tip: If the avast cleanup is not worked for you, you can rerun the same method for a component called Behavioral Shield. If the Avast Service High CPU Usage issue is fixed, you can try to rerun it. And the CPU usage will remain constant.
Method #2 Run Command Prompt as Administrator
This solution is straightforward, and it can convert the scan frequency into a maximum value. It will disable background checks and surveillance, and will only occur once. Doing so may cause some security issues, but it is guaranteed that the CPU usage will return to normal.
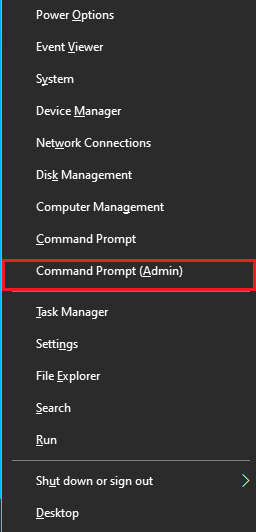
Step 1: Firstly, use the Windows Key + X key combination to open the menu, where you must select the Command Prompt (Admin) option. Alternatively, you can right-click on the Start menu or search for a command prompt for the same effect, right-click on it and select Run as Administrator.
Step 2: Next, reach the following folder and type the command provided, where you can perform further actions.
C:\ ProgramData\AvastSoftware\Avast
Step 3: Now, click the file of Avast5.ini after that insert the following command.
[GrimeFighter] : ScanFrequency=999
Step 4: Furthermore, save the file and Reboot the PC and see if the Avast Service High CPU Usage error is resolved instantly.
Method #3 Updating Avast to the Latest Version
For the antivirus tool to work successfully, some older versions of Avast do not respond. We recommend that the virus and virus definitions keep the database up to date. It is easy to update Avast and follow the steps provided below.
Step 1: First of all, open the Avast user interface by clicking its icon on the system attempt or locating it in your Start Menu entry.
Step 2: After that, navigate to the refresh tab, and you will see that there are two refresh buttons. One of these buttons relates to updating the virus definitions database. Other buttons relate to updating the program.
Step 3: Most users have reported that updating their virus definitions has resolved the problem. But it is best to update both the database and program by clicking these two update buttons. Be patient while checking Avast updates, and follow the on-screen instructions, Parra.
Step 4: At last, check to see if the Avast Service High CPU Usage is back to normal.
Method #4 Scan Avast Screensaver
In some cases, this is related to the Avast Screensaver. As it appears to continue the scan even though the Screen Saver is no longer running. While this does not happen continuously, often enough, the problem is still there. And it does not cause much CPU usage. The worst part is that it does not show up in the Avast interface. Here’s how to solve the problem:
Step 1: At first, right-click on a random file located on your computer. Then choose to scan the file with Avast in the context menu.
Step 2: The Scan Result window should pop up, and you can see a list of currently running scans.
Step 3: Then, locate the Avast Screensaver Scan and click on the Stop button next to it and see if the CPU usage is back to normal.
Method #5 Uninstall Avast from Control Panel
If there is anything wrong with the Avast installation, it is best to go to the Control Panel and fix it. Consider the fact that this solution has worked for a lot of people. In the meantime, you may have to adjust the settings you have changed.
Step 1: First of all, make sure that you are logged in to the administrator account. It is because programs cannot be deleted using any other account.
Step 2: Now, click the Start menu, search for it, and open the Control Panel. Alternatively, if you are using Windows 10, you can click on the Setting icon to open the settings.

Step 3: In the Control Panel, see: Select the category in the upper right corner and click Uninstall a program under the Programs section.
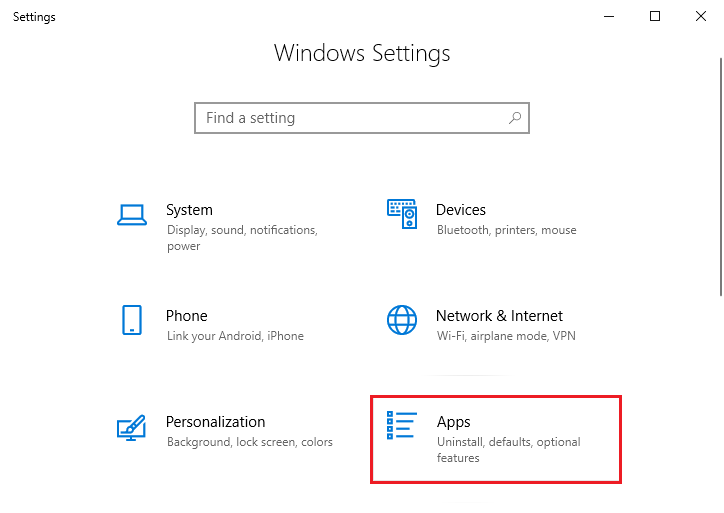
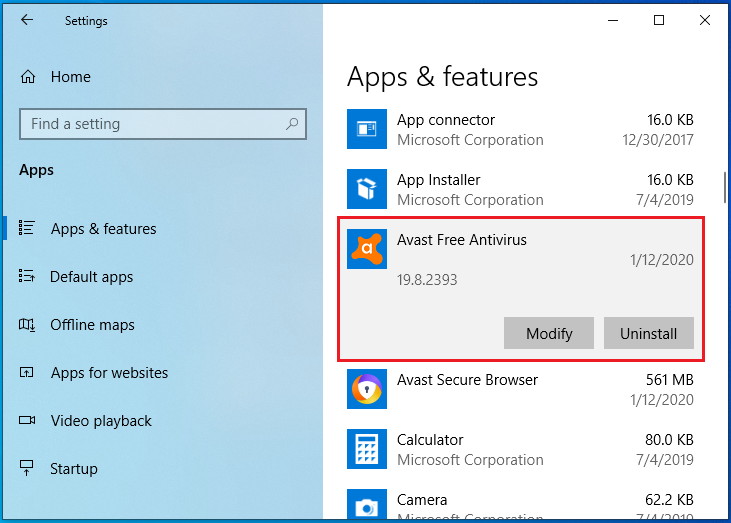
Step 4: If you are using the Settings app, click on Applications. It will immediately open a list of all programs installed on your computer.
Step 5: Find Avast present in Settings or Control Panel and click the Uninstall option.
Step 6: The Uninstall wizard is going to present two options.
Step 7: A message will pop up, asking for process confirmation. Avast restarts with the default settings functioning before the error starts.
Step 8: Once the uninstall process is complete, click Finish. Then, restart your computer to see if errors still appear.
You might also like:
- What is msdia80.dll and Should You Delete it?
- Widevine Content Decryption Module
- VAC Was Failed to Verify the Game Session Error in CS: GO
- io.netty.channel.AbstractChannel$AnnotatedConnectException: Connection refused: no further information Error on Minecraft
Conclusion
Undoubtedly, Avast is one of the best Antivirus software. But sometimes it will irritate you by demanding high CPU usage.
Now you know how to retrieve that problem through these reasons. We believe these simple troubleshooting processes are really helpful. And this article proves useful to rectify the Avast service high CPU usage.