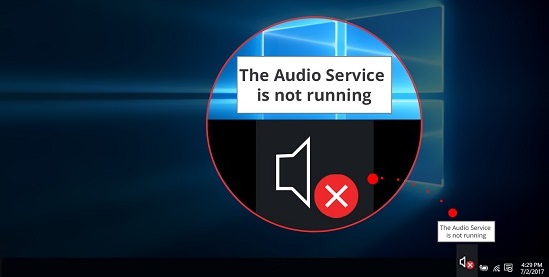
The Audio Service is not running is the message displayed by Windows OS to notify the user that the service has stopped working due to some technical problems in the system itself. There are a couple of ways to fix this problem with ease; but to do this, it is necessary to understand the common factors that cause this error and how to deal with them.
Contents
What Causes The Audio Service is Not Running Error?
- Incompatible/outdated audio drivers.
- Audio services are stopped.
- Missing permissions to run audio services.
- Audio drivers are not compatible with the audio hardware.
AUDIO SERVICE.EXE: This particular service is an executable file. This service executable is located in a subfolder of the user’s profile folder located on the C drive. The system should be clean for the audio service to be working properly.

3 Ways to Fix The Audio Service is Not Running Error
There are various ways to fix the error of the audio service not running in the system. Only the most effective of the methods have been discussed in this guide. These are:
Read Also:
SOLUTION 1: SIMPLY INCREASE OR DECREASE YOUR COMPUTER’S VOLUME
Sometimes, the most simple and easiest solution lies right in front of the eyes, and still, we fail to notice it. One of them is to simply try increasing and decreasing the volume of the audio device to check if it is working properly and hasn’t been muted by mistake.
UNMUTING THE VOLUME IF MUTED:
- Go to the Taskbar notification bar and right-click on the Sound
- Click and open the “Open Volume Mixer” option available.
- Click on the volume icons below all the devices and apps to un-mute the volume.
INCREASING THE VOLUME MANUALLY:
- Go to the Taskbar notification bar and left-click on the Sound
- A volume slider will appear now.
- Pull the slider all the way to the right to set the volume to the maximum.
This will ensure that there isn’t any problem with the mute option of the audio device. Even if there was, it should be fixed now and the service should be running properly.
SOLUTION 2: RESTART THE WINDOWS AUDIO SERVICE AND ALL OF ITS DEPENDENCIES
Restarting the Windows Audio Service manually is probably the best way to solve this problem as the settings will be reverted to default and any errors caused due to modification of audio system files should be fixed.
To do this, just follow the steps given below:
WINDOWS AUDIO SERVICE:
- Go to the Start Menu and search for “Services”.
- Click and open the Services
- Scroll down through the available list of services and locate the “Windows Audio” service.
- Right-click on the service and click on the “Restart” option.
- Then, double click on that service again to launch the Properties
- Now, set the Startup type to Automatic.
- Click on Apply and then on OK.
WINDOWS AUDIO ENDPOINT BUILDER SERVICE
- Scroll down through the available list of services and locate the “Windows Audio Endpoint Builder” service.
- Right-click on the service and click on the “Restart” option.
- Then, double click on that service again to launch the Properties
- Now, set the Startup type to Automatic.
- Click on Apply and then on OK.
MULTIMEDIA CLASS SCHEDULER SERVICE
- Scroll down through the available list of services and locate the “Multimedia Class Scheduler “service.
- Right-click on the service and click on the “Restart” option.
- Then, double click on that service again to launch the Properties
- Now, set the Startup type to Automatic.
- Click on Apply and then on OK.
SOLUTION 3: CHANGING LOG-ON SETTINGS
First of all, the word “Log-in/on” is used to describe a set of credentials that authenticates a user to use the system. Usually, these credentials consist of simply a username and a password. But often, applications and services use the logged-in user’s configurations to run the system. These configurations might not run when another user logs in to the system with different credentials.
This is where this solution or fix comes into play. The log-on settings for the audio services will be changed so that they are allowed to run across different user profiles regardless of which profile it was created in. The configuration will be made available to the whole system, and will not be restricted by one user log on.
To do this, follow the steps given below:
- Go to the Start Menu and search for “Services”.
- Click and open the Services
- Scroll down through the available list of services and locate the “Windows Audio” service.
- Then, double click on that service again to launch the Properties
- Now, under the Log On tab, select the “Local System Account”.
- Also, check the option of “Allow service to interact with desktop”.
- Click on Apply and then on OK.
- Restart the system and check if the problem persists.
OTHER WAYS TO FIX THIS PROBLEM
Although only three methods have been discussed in this guide, there are a lot of ways to get rid of this problem with ease. The main decision lies with the user keeping the convenience and effectiveness of the fix in mind.
Some of the other ways to fix this problem are:
- Troubleshooting Audio
- Restoring and modifying key
- Updating the audio drivers
- Performing a clean boot of the system
Read Also:
Conclusion
This problem of audio services not running is very annoying to deal with. Fortunately, it is as easy to deal with without having any complex technical knowledge. The users are advised not to install third-party applications to solve this problem.

