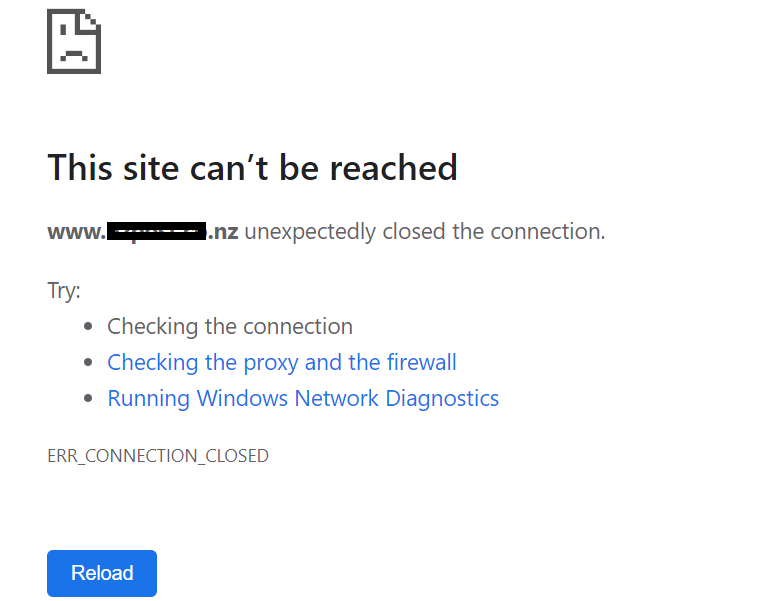
Have you come across the This Site Can’t Be Reached message while surfing sites with Chrome? Many users are facing this and if you are one of them, then there is no need to worry anymore because here we have come up with the most efficient solutions to fix this issue.
It is well known that Google Chrome is the most reliable, secure, and widely used browser across the world, despite it is sometimes ineffective to tackle minor bugs and glitches. The worst thing about this error is that it prevents users from surfing specific websites using Chrome.
Read Also:
Contents
- 1 How to Fix This Site Can’t Be Reached Error in Google Chrome
- 1.1 Method #1 Use Other Browsers
- 1.2 Method #2 Scan your Device for Malware
- 1.3 Method #3 Clear Browser Cache, History, and Cookies
- 1.4 Method #4 Reset Chrome Browser Settings
- 1.5 Method #5 Reset WiFi Modem
- 1.6 Method #6 Restart DNS Client
- 1.7 Method #7 Change IPv4 DNS Address
- 1.8 Method #8 Disable “Experimental QUIC Protocol” Flag
- 1.9 Method #9 Change Maximum Allowed TLS Version
- 1.10 Method #10 Reset the Chrome Profile Sync
- 1.11 Method #11 Remove Browser Extension from Chrome
- 1.12 Method #12 Reset TCP/IP
- 1.13 Method #13 Reinstall Chrome
- 2 Conclusion
How to Fix This Site Can’t Be Reached Error in Google Chrome
If you have encountered the same and don’t have any idea about how to fix it, then there is no need to bother about it as it is trouble-free to get rid of This Site Can’t Be Reached issue and here you will get to know every possible cause behind this error and troubleshooting steps of the same. The provided solutions will surely help you to tackle the error.
Method #1 Use Other Browsers
It might be possible that the trouble is specific to the browser you are using. If it is so, then try using a different internet browser to solve this issue. Moreover, try using reliable browsers such as Mozilla Firefox, Internet Explorer and Opera.
Method #2 Scan your Device for Malware
Since this error can also be caused by viruses or malware in your system, performing a scan can detect and delete all the malicious and infected files from your device which might be the root factor of the issue. You need anti-malware software to accomplish this task.
Method #3 Clear Browser Cache, History, and Cookies
The issue can be resolved by clearing the browser’s cache, history and cookies as overloading can stop you from browsing the webpages. Proceed further with these steps for clearing the browse’s history:
Step 1: Open Chrome, and click the three dots at the top right corner. Choose the option History and then again History from the sub-menu. Alternatively, press Ctrl + H
Step 2: Select Clear browsing data option from the left panel and you will get the choice to clear your browsing data for a range of dates and times. To delete all your history, choose the option All Time. Click on Delete and the item will get deleted from your Chrome history.
If clearing the history does not prove useful in removing the This Site Can’t Be Reached error, you are recommended to try out the next method.
Method #4 Reset Chrome Browser Settings
You can try resetting the browser and this will reset the startup page, new tab page, search engines, and pinned tabs. It will also disable all extensions and cookies. Your bookmarks, history, and saved passwords will not be removed. You need to proceed with below instructions:
Step 1: At first, open the Google Chrome browser and click on the three vertical dots at the top right-hand side of Chrome. Choose the Settings option when the drop-down menu appears.
Step 2: Now, scroll down at the bottom of the page and click on Advanced
Step 3: In the Reset and clean up section, click on Restore settings to their original defaults
Step 4: Click on Reset settings and reset your browser.
Method #5 Reset WiFi Modem
Resetting the WiFi modem can help you in resolving the issue. Moreover, if you are using any router, then reset it too.
Step 1: Firstly, unplug your router and locate the Reset button on your router. It is a small depressed hole so that the users can’t press it accidentally. Mostly, it is at the back or the bottom.
Step 2: Now, press the reset button for 15-20 seconds. Use a small sharp object such as a pin, paperclip, or toothpick to press the hole. Release the button when you will notice a light blinking. This will complete the resetting process.
Step 3: When you will release the button, the router will reset to its factory default settings. After the completion of the resetting process, you should modify the settings as this process will set all your settings to default.
Method #6 Restart DNS Client
Many users have noticed that restarting DNS client has helped in resolving the This Site Can’t Be Reached issue. This is simple as well as an effective method and you are recommended to try it once. So, go through these steps to do the same:
Step 1: Press Windows key + X or right-click the Start menu, from the list of options, select Command Prompt (Admin), and then click Yes to give it the permission to run with administrator privileges.
Step 2: The Command Prompt window will open up, copy and paste these commands and press Enter after executing each command.
net stop dnscache
net start dnscache
ipconfig /flushdns
If the process stops in between with access denied message, then you can type NET HELPMSG 3521 for further help. After executing all the commands successfully, exit the command prompt, and then open the browser again. Hopefully, This Site Can’t Be Reached error will not pop up again.
Method #7 Change IPv4 DNS Address
Changing the IPv4 DNS Address has helped at a lot of users in resolving the issue. So, use these steps to do so:
Step 1: Open Control Panel and select the Network and Internet. Now, click on Network and Sharing Center and then from the left panel, select the Change adapter settings option.
Step 2: Further, right-click the network interface that connects your PC to the internet, and select the Properties option from the menu. Check the Internet Protocol Version 4 (TCP/IPv4) option and select the Properties
Step 3: Select Use the Following DNS Server Addresses Now, type your Preferred and Alternate DNS addresses. If you are using Google public DNS, then type 8.8.8.8 in the preferred address and 8.8.4.4 in the alternate address. Click OK to save the changes.
Method #8 Disable “Experimental QUIC Protocol” Flag
Try disabling the “Experimental QUIC protocol” flag and follow this approach to do so:
Step 1: Open the Google Chrome browser. In the address bar, type the command chrome://flags/ and press Enter.
Step 2: Now, type Experimental QUIC Protocol in the search tab. Expand the drop-down menu and choose the option Disabled. Now, exit the browser and open it again.
Method #9 Change Maximum Allowed TLS Version
Many users have noticed that changing the maximum allowed TLS version has helped in resolving the issue.
Step 1: Firstly, open the Google Chrome and type chrome://flags in the address bar. Press Enter.
Step 2: Type TLS in the search tab to find Maximum TLS VersionExpand the drop-down menu and choose the option TLS 1.3 instead of the default.
Now, restart your browser.
Method #10 Reset the Chrome Profile Sync
If none of the above methods worked out, then you can try resetting the chrome profile sync. Moreover, you only need to do this once. Doing this will stop syncing all your devices and will remove your synced data from your Google account.
Step 1: Firstly, make sure that you are signed in to your Google account. Now, open your Google Dashboard.
Step 2: Select Reset sync to stop syncing and clear all synced data. Click on OK to save the changes.
Method #11 Remove Browser Extension from Chrome
Google Chrome extensions are programs that are installed in Chrome which have the right to change the browser’s functionality. It might be a possibility that some of these installed browser extensions that are designed for blocking ads and spams are preventing you from accessing the website.
Moreover, some of these extensions might not be well-established, and removing them is a better option. So, proceed with the steps below:
Step 1: Open the Google Chrome browser and then in the address bar, type the command chrome://extensions. Press Enter.
Step 2: You will find a list of all the installed extensions.
Step 3: At the bottom of every extension, there will be a toggle. Turn the toggle off in order to disable all the suspicious extensions. If disabling the extension doesn’t give out any result, we recommend you to remove the extension.
Step 4: Now restart the computer and check whether the This Site Can’t Be Reached error still exists or not.
Method #12 Reset TCP/IP
Try resetting the TCP/IP ( Transmission Control Protocol/Internet Protocol ) which will require you to execute few commands on Command prompt. To do so, go through these steps:
Step 1: Firstly, go to the Start Type cmd in the Search tab and press Enter. Right-click on the Command Prompt option and choose Run as administrator from the context menu.
Step 2: Command Prompt window will open up.
Step 3: Finally, execute these commands and press Enter after executing each command.
ipconfig /release
ipconfig /all
ipconfig /flushdns
ipconfig /renew
netsh in tip set dns
netsh Winsock reset
After executing all the commands successfully, exit the command prompt and restart your PC to save the changes. Hopefully, the error will not pop up again and you would be able to resolve the issue. If the error still shows up, then try the next method.
Method #13 Reinstall Chrome
Reinstalling Chrome is a good option to resolve this issue but don’t forget to take a backup of your data as it will delete it all.
Step 1: Press Windows Key + I hotkey to open Click on Apps and choose Apps & Features from the left panel.
Step 2: Now, scroll down and search for Google Chrome. Click on it and select the Uninstall, again click on it for confirmation.
Step 3: After the process completes, restart your PC to save changes. Now, download and install the latest version of Google Chrome.
Check Out:
- Confirm Form Resubmission
- Error Loading Player: No Playable Sources Found
- ERR_CACHE_MISS
- NVIDIA Display Settings Are Not Available
Conclusion
Finally, we have discussed every possible cause of This Site Cannot Be Reached error and the solution to fix the same. Hopefully, you would be able to resolve the issue after applying the above methods.