Every computer leaves a digital footprint when performing various online activities. Third-parties can collect, store, and misuse such data if the user isn’t as diligent as they should be. But a quick installation process is enough to protect and preserve one’s online privacy. And the best software solutions that can do that is VPN for PC.
A VPN, or a “virtual private network” routes your connection to the internet through one of its servers. There, it encrypts it, so no third-party (not even your ISP) can access it.
In today’s world of adware, spyware, ransomware, and other forms of harmful exploits, it is an essential form of protection for your browsing and other online activities. But you need to consider a couple of important things before choosing a VPN for Windows 10.
Contents
How to Choose a Suitable VPN for PC
With so many different choices on the market, one can get confused about which one to go for. Many vital aspects differentiate high-quality service providers from lower-class companies. Here’s what you should take into consideration when choosing a perfect VPN solution for PC.
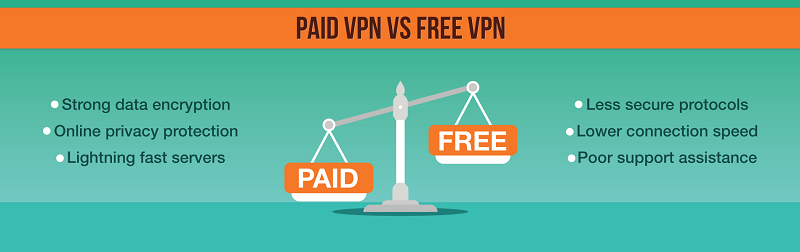
1. Free vs. Paid
Unless you’re using a VPN free trial to test out the service, it is not recommended to download free VPN solutions. And no, it is not a ploy designed to make customers buy premium subscriptions. It is, however, a serious privacy concern because free VPN companies sometimes collect user data. Moreover, they may have weaker protocols, which impacts one’s online anonymity. Paid versions offer more features, server locations, and the speed is way better.
2. Features and Server Locations
Users should always make a choice based on their needs. Different VPN companies offer different features. So performing a bit of research is a must. But there are some cool features to keep an eye on when going through available options:
- VPN killswitch shuts down the computer’s network connection in case the VPN connection stops or is interrupted for some reason.
- Split Tunneling lets you choose which programs to open through VPN and which ones should use a regular connection.
- Onion over VPN lets you browse through the Tor network without needing the Tor browser. Plus, unlike with Tor browser, your connection stays encrypted at all times.
- SmartDNS is excellent for watching unencrypted geo-restricted content.
3. Protocols
Since the whole point of using a VPN is to protect one’s online activities, having high-quality security protocols in place is a must. Different companies use different protocols. So make sure to research each service before buying a subscription. You should look for L2TP/IPsec, OpenVPN, SSTP, and IKEv2 protocols, while you should avoid PTPP.
Read More:
- Android Data Recovery Software
- Windows Update Error 0x80070020
- How to Delete Google History, Search, and Location Data
- What is IDP.Generic, How to Overcome IDP Generic Virus
Step-By-Step Tutorial on How to Install VPN on Windows 10 PC
Step 1: Open Windows settings by pressing the Windows key + I, by typing “Settings” in Cortana search box, or by finding the “Settings” button on the Start Menu.
Step 2: Locate the VPN tab from the menu on the left and open it.
Step 3: At the top of the window, you will see the “Add a VPN Connection” option. Click on it, and another window will appear.
Step 4: The next window will ask to enter the following information:
- VPN provider
- Connection name
- Server name or address
- VPN type
- Type of sign-in info
Under the “VPN provider” field, open the drop-down menu and select “Windows.” Choosing that option will change the “VPN Type” box to automatic, and the “Type of sign-in info” will change to username and password.
Step 5: Next, enter the connection name and server information. It can vary depending on the preferred service provider.
Step 6: Then, scroll down a bit and look for the field where you should enter your username and password for the VPN. Those will match the ones you’re using with your VPN of choice. Then, click “Save.”
Step 7: On the bottom right part of the screen, find the WiFi icon, and connect to your recently added VPN connection. It should appear at the top of the list. Voila, you’re connected.

What If My VPN Uses IKEv2 or Other Complex Protocols?
The instructions mentioned above will work if the VPN in question uses L2TP/IPsec protocols. For other connection types, such as IKEv2, you might need to install root certificates from your VPN service provider. Here’s how to do it:
Step 1: Download the root certificate from the VPN website and open it.
Step 2: Click “Next” and then select “Install Certificate.”
Step 3: Now, click the “Local Machine Radio” button and then “Next.”
Step 4: Select the “Place all certificates in the following store” and click “Browse.”
Step 5: A smaller window that contains different folders will appear. Choose the “Trusted Root Certification Authorities” option, press “Ok,” and then “Next.”
Step 6: Press “Finish” and then “Ok.”
Step 7: Then, repeat all the steps from the first set of instructions, and you’ll be able to use the VPN immediately.
Read Also:
- Masterani
- Antivirus Software
- Robert Eggers on the Northman Directing is an Insane Job
- Olympic Champion Peres Jepchirchir Wins the 50th Womens Boston
Conclusion
So, this is all about how to use VPN for Windows PC. In fact, we have proved that why we should use VPN. If you want any help regarding VPN then you can comment below.