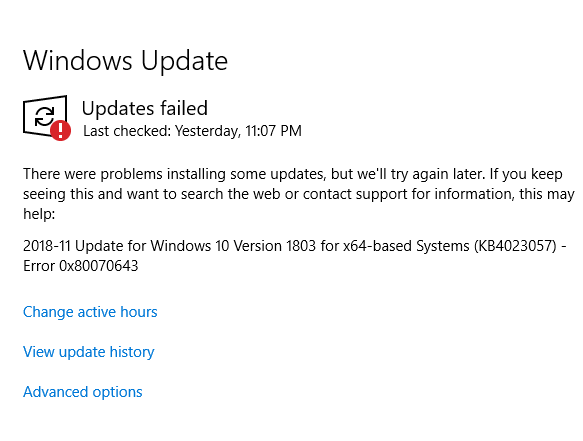
Windows update error is majorly reported by most of the Windows OS user. The error occurs while the window is updating its defender. It is displayed on the screen with the message as “Definition Update for Windows Defender – Error 0x80070643“.
The error causes the failure to update its defender. Hence, it stands for the indication of a fault in the installation process. There may be appropriate downloading of Windows, but it is interrupted again and again by the pop-ups and disturbs it from installing properly and completely in the computer system.
Contents
- 1 12 Ways to Fix Windows Update Error Code 0x80070643
- 1.1 Method #1 Restart Your Computer
- 1.2 Method #2 Disable Antivirus Program
- 1.3 Method #3 Install the Latest Version of .NET Framework
- 1.4 Method #4 Restart Windows Installer Service in Your PC
- 1.5 Method #5 Manually Update Windows Defender in Your PC
- 1.6 Method #6 Run Scan now or SFC on Your PC
- 1.7 Method #7 Use Troubleshooter
- 1.8 Method #8 Use System Restore Feature
- 1.9 Method #9 Reset the Components of Windows Updates to Fix the Issue
- 1.10 Method #10 Uninstall Windows Defender Update
- 1.11 Method #11 Update Using Administrative Permissions
- 1.12 Method #12 Run SubInACL Tool
- 2 Conclusion
12 Ways to Fix Windows Update Error Code 0x80070643
The error code 0x80070643 can be caused due to some of the undeleted files of the previous antivirus program left in your computer or due to some corrupted files saved in your computer system.
Hence, to get rid of this problem, many users look for some suitable and appropriate methods for the error caused in their computer system.
Since there are various solutions to fix the number of issues; therefore, it is necessary to first look at the cause of the error and then move on to apply a certain method in your computer system. So, before you proceed to be well prepared for the reason and do proper research, we have mentioned some of the methods below that may solve the issue. Just have a look.
Method #1 Restart Your Computer
This will may sound an easy task and useless task for you. But, sometimes the number of problems is quickly solved by this doing. So, if you are having such major issues related to code error or something else, then you firstly go for this method.
Just restart your computer system, and reinstall the program you wanted for. Because sometimes the previous installation also requires the restarting of the PC and then have a fresh move next.
Read Also:
- Windows Update Error Code 0x8024a105
- Error Code 0x80300024 When Installing Windows
- Windows Update Error 0x80070020
- api-ms-win-crt-runtime-l1-1-0.dll is missing
Method #2 Disable Antivirus Program
There is a possibility of having interruption between the antivirus program you have installed in your computer system and the Windows update you wish to install. So to cure that problem, you need to disable your Antivirus first and then check whether the issue is fixed or not.
After this, go to the Windows Update and check if you can update your system now. The error code 0x80070643 may disappear after doing the process. Follow the steps to disable the Antivirus:
Step 1: Firstly, right-click on the icon of Antivirus you are using in your PC and select the option to Disable.
Step 2: Select the time period you wish to disable the Antivirus. The recommended time period is between 15 to 30 minutes.
Step 3: Run Windows Defender. See if the message Windows Defender Update fails with the error code 0x80070643 has vanished or not.
Method #3 Install the Latest Version of .NET Framework
The .NET framework has a key role in installing the latest system updates. So, if you don’t have .NET framework installed in your computer system or if it is outdated, then first install it or the latest version of it in your PC from Microsoft in your computer system. Follow the given steps to download the .NET framework:
Step 1: Firstly, go to the official website of the .NET framework.
Step 2: Secondly, select the latest updated .NET framework version. If downloaded, then you can also download the other older versions of the .NET framework if required.
Step 3: Now click on the download option and let the process begin. Open the installed file, whether in your PC or laptop to install it completely after following the given instructions on it.
Step 4: Last, when you have downloaded the program completely, check for the Windows updates now and see if you are able to update the Windows in your computer system or not.
Method #4 Restart Windows Installer Service in Your PC
The occurrence of error code 0x80070643 is due to some faulty configurations in the Windows install service of the computer system. The method you can try is to reinstall the Windows Installer service in your PC. To follow this process goes for the given steps:
Step 1: Firstly, press Win + R altogether on your keyboard.
Step 2: Secondly, type “services.msc” and then tap on Enter to open the service Windows in your PC.
Step 3: Thirdly, click on the Windows Installer option and on restart.
Step 4: At last, see if your problem has been resolved or not.
Also Read:
Method #5 Manually Update Windows Defender in Your PC
Step 1: In the beginning, press Windows + Q keys altogether on your keyboard. Then search for Windows defender.
Step 2: Next, click on Virus & threat protection option under Protection areas.
Step 3: Thirdly, click on Virus & threat protection updates button. Now, go for the option Check for updates. It will then take some time to download the latest updates available in your computer system.
Step 4: And last, reboot the computer and save the changes you have made in your computer system.
Alternate method:
You can also use the command prompt in your computer system to update the Windows defender. To apply this method follows the steps:
Step 1: First, press Windows + X keys simultaneously. Then choose Command Prompt (Admin).
Step 2: Then, type the command given below in cmd and press Enter key after typing each one of them:
"%PROGRAMFILES%\Windows Defender\MpCmdRun.exe" - Remove Definitions -All
"%PROGRAMFILES%\Windows Defender\MpCmdRun.exe" – SignatureUpdate
The process will take place after the command is entered.
Step 3: Last, close the cmd and reboot your system now.
Method #6 Run Scan now or SFC on Your PC
The existence of corrupt or malicious files in your computer system is the cause of creating error. Due to this reason, the Windows may fail to update and hence creating error code. In this case, the SFC scan is the useful tool to scan all the corrupted files and replace them with the right files in your computer system. To do SFC scan in your computer system, follow the given steps:
Step 1: Press Windows key + X simultaneously at first. Then select Command Prompt (Admin) from the menu.
Step 2: After that, type “SFC /scan now” in the command prompt and press enter. Wait for some time until the scanning is complete.
Step 3: And last, install system updates now. If it is installing then, 0x80070643 error has fixed now.
Method #7 Use Troubleshooter
For troubleshooting, apply the steps given below:
Step 1: Firstly, click on the start menu and search the word “troubleshoot” in the search bar. The troubleshoot option will be displayed.
Step 2: Now, extend the Windows Update option & click on Run the troubleshooter button. Then run the Windows update troubleshoots after reading the on-screen instructions.
Step 3: Now, restart your computer and check if you can fix the error code 0x80070643 now.
Method #8 Use System Restore Feature
The system restores feature will restore the Windows updating system and makes it stable and working like before. The process is convenient to use and does not cost any data or information. Though, the drivers or applications you have installed after restore point may get deleted after that.
So if you are facing the error code 0x80070643 on your computer screens during the installation of Windows Update, create a system restore point and then use your computer without any error.
Method #9 Reset the Components of Windows Updates to Fix the Issue
Step 1: First, press Windows key + X simultaneously. Click on the command prompt (admin).
Step 2: Then type the commands mentioned below and hit the Enter key after each one to stop Windows Update Services:
net stop wuauserv
net stop cryptSvc
net stop bits
net stop msiserver
Step 3: After that, type the commands given below to rename the Software Distribution Folder. Press “Enter” key after each one:
Ren C:\Windows\SoftwareDistribution SoftwareDistribution.oldRen C:\Windows\System32\Catroot2 catroot2
Step 4: After that, type the given commands to start the Windows Update Services. Press “Enter” key after typing each command:
net start wuauserv
net start cryptSvc
net start bits
net start msiserver
Step 5: Finally, reboot your computer system and save all the save changes you have made. Now, check if the error 0x80070643 is still showing or not.
Method #10 Uninstall Windows Defender Update
The idea of using the system Windows restore on Windows 10 is vague. However, regular rebooting of the computer system also makes it irritating for the users. Therefore, if you are having the same circumstances and getting the error code 0x80070643 on the computer screen. Then, you should go for the method of removing Windows defender update and get back to the early state of the window. To do that, follow the given steps:
Step 1: Firstly, Press Windows + R keys simultaneously to open the Run window. Then type “appwiz.cpl” and hit Enter to open Programs and Features.
Step 2: Then, click on View Installed Updates icon displayed on the left side of your screens.
Step 3: Now, scroll down to Microsoft Windows. Then right-click on the Windows Defender or KB4054517 Update, which is the cause of the error code 0x80070643.
Step 4: Finally, click on Uninstall and restart your PC to check if your issue has been resolved or not.
Method #11 Update Using Administrative Permissions
It is necessary to take administrative permission to install the updates on your computer. So, if you have not created your account on your computer and working as a guest or lesser privileged account then, first sign up on your computer.
If your computer belongs to a specific domain that you are unaware of, call your system administrator to help you with this.
Method #12 Run SubInACL Tool
Many Windows XP or Windows Vista users are aware of the fact that a bug involves .NET Framework 2.0 that persists due to incorrect access control list permissions on registry hives that leads to causing hindrance for some applications from getting installed.
The SublnACL tool is used in that case to solve the issue by repairing the corrupt file registry permissions that are necessary to install.MSI based setups. To apply these methods follow the given steps:
Step 1: Firstly, Download SubInACL tool & install it on your system. This tool will install into:
C:\ProgramFiles\Windows Resource Kits\Tools
Step 2: Then go to the file and copy-paste the code in the notepad file. After that, go to the option file then “Save As” to save the file.
Step 3: Later, name it as reset.cmd. At last, changes file type to All Files. Then right-click on the Script → Run as administrator.
Step 4: Wait till the reset.cmd script completes. Try installing the software which failed to get installed on your computer earlier.
Read Also:
Conclusion
In the end, we would like to state that all the mentioned methods are best and appropriate for your computer system to fix the error related to Windows update. Each method comes with all the defined methods and stands for a specific cause.
Therefore, if you are unable to classify the type of error you are facing, then you can first have research on it to find the reason, and directly you can apply the method related to it.
To make the processing convenient, we have provided not only limited methods, but there are numerous ways to fix the issue n your computer system. However, there are chances of not getting the permanent solution, but there are more chances to get success in using these methods.
So, before you look for a method and go to follow it on your computer, firstly, read the steps and then execute it carefully. We hope that we may found a certain solution to your problem.